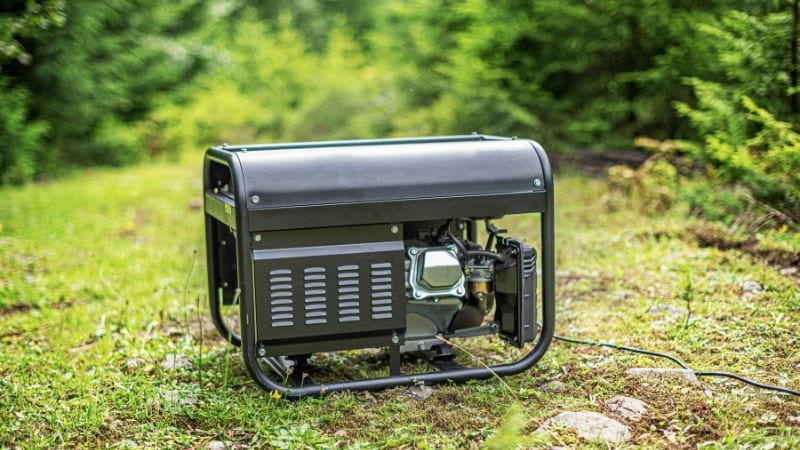
Is your generator not starting as easily as it used to? Maybe it’s surging, losing power, or just seems to be burning more fuel than normal. Before you worry about a major repair, there’s one simple and free thing you can check that often solves the problem: the air filter.
Think of your generator’s air filter like its lungs. It needs a steady flow of clean air to mix with fuel and create power. A dirty, clogged filter chokes the engine, leading to all sorts of issues. The good news is that cleaning it is a quick and easy job that anyone can do.
This guide will walk you through the entire process in simple steps. You’ll learn how to identify your filter type, clean it the right way without causing damage, and know when it’s time for a replacement. Let’s get your generator breathing easy again!
Why Clean the Generator’s Air Filter Matters
A clean air filter lets plenty of air flow into the engine. Inside the engine, this air mixes with fuel to create the combustion that powers your generator. If the air filter is clogged with dirt, dust, and debris, it’s like trying to breathe through a wet cloth. The engine gets less air, which leads to several big problems:
- Loss of Power: The engine can’t get enough air for a proper “fire,” so it struggles and can’t produce its full power.
- Wasted Fuel: Because the air-fuel mix is wrong, the generator burns fuel inefficiently, costing you more money at the gas pump.
- Hard Starting: A choked engine is much harder to start up.
- Engine Damage: This is the worst-case scenario. Dust and grit that get past a dirty filter act like sandpaper inside the engine, causing wear and tear.
Simply put, cleaning your air filter is one of the easiest and most important things you can do to keep your generator running smoothly for years.
Identify Your Generator’s Air Filter Type
Before you start cleaning, you need to know what type of air filter is for your generator. You can find this information in your generator’s owner’s manual, or you can just take a look at the filter itself. There are three common types.
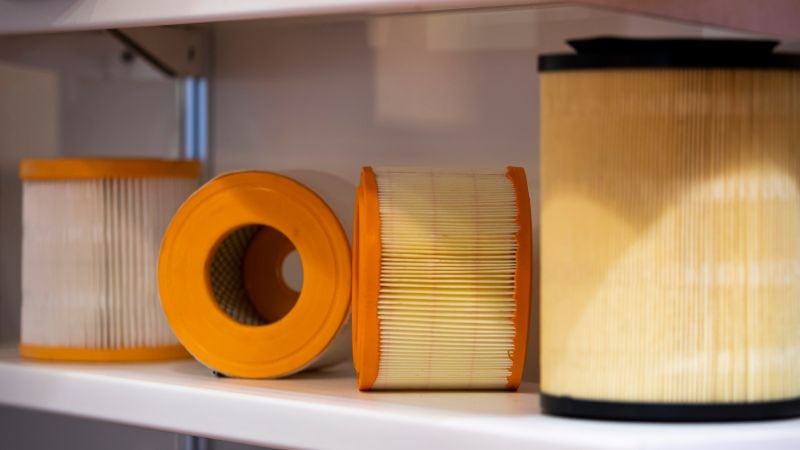
Paper Pleated Filters
This is the most common type found on modern portable generators. It looks like a stiff, cardboard-like rectangle or circle with deep, accordion-style pleats. These pleats create a large surface area to trap tiny particles.
Foam Filters
You’ll often find foam air filters on older generator models or machines meant for very dusty job sites. They feel soft and spongy, like a kitchen sponge. Often, they are coated with a special sticky oil that helps trap even the finest dust.
Dual-Stage Filters
For the toughest conditions, some generators have dual-stage filters. These are like a two-in-one defense system. They consist of a foam sleeve wrapped around an inner paper filter. The foam catches the larger debris, and the paper catches the finer stuff.
How to Clean Your Generator Air Filter
Cleaning a generator air filter is a simple job that takes less than 15 minutes. Just follow these steps.
Step 1: Safety First & Preparation
Your safety is the most important part. Always turn the generator completely off and let the engine cool down before you begin. To be extra safe, disconnect the spark plug wire. This guarantees the engine cannot accidentally start while your hands are near it. Find a clean, well-lit workspace and gather your supplies: a screwdriver, a clean rag, and a pair of gloves.
Step 2: Locate and Remove the Air Filter
The air filter is always located on the body of the generator. It’s usually under a large, rounded or square cover on the side. This air filter cover is typically held on by a couple of screws or simple latches. Use your screwdriver to loosen the screws or flip the latches, then carefully remove the cover. Inside, you will see the air filter. Gently pull it straight out. If you’re unsure how it sits, taking a quick picture can help you remember how to put it back.
Step 3: The Cleaning Process
You have to use the correct method for your specific filter type.
- Cleaning a Paper Filter: Never use water or a high-pressure air hose! This can force dirt deeper into the paper and ruin it. Instead, gently tap the filter on a flat surface to knock loose the caked-on dirt. Then, use a soft-bristled brush (an old paintbrush works great) to carefully brush away dirt from the pleats. For a deeper clean, you can use the hose attachment on a vacuum cleaner to suck dirt from the outside of the filter. To check if it’s clean, hold it up to a light bulb.The cleaned filter should show clear light penetration through its pleats.
- Cleaning a Foam Filter: First, wash the filter in a bucket of warm water with a few drops of mild dish soap. Gently squeeze the filter over and over until the water runs dirty. Do not twist or wring it out, as this can tear the foam. Rinse it thoroughly with clean water until all the soap is gone. Next, you must let it air dry completely. This might take a few hours. Never put a wet foam filter back in! Once it’s totally dry, it’s time to re-oil it. Put a few drops of special air filter oil (or fresh engine oil) onto the foam and squeeze it repeatedly to spread the oil evenly. The goal is a uniform, tacky feel—it should be moist to the touch but never dripping.
- Cleaning a Dual-Stage Filter: Carefully separate the outer foam sleeve from the inner paper filter. Clean the foam sleeve with soap and water as described above. Clean the inner paper filter using the “dry” method for paper filters. Once both are clean and dry, re-oil the foam sleeve and put the two parts back together.
Step 4: Inspect the Air Filter Housing
While the filter is out, take a moment to look inside the empty compartment where the filter sits (this is called the housing). Use your clean rag to wipe out any dust, leaves, or dead bugs that may have gathered in there. A clean housing ensures no dirt immediately gets sucked into the engine when you start it up again.
Step 5: Reinstall the Filter Correctly
Place your clean and dry filter back into the housing, making sure it sits snugly and seals all the way around the edges. A loose filter will let dirty air bypass it completely. Put the cover back on and tighten the screws or snap the latches shut. Finally, don’t forget to reconnect the spark plug wire.
When to Clean or Replace Your Air Filter
A good rule of thumb is to check your air filter every 50 hours of use. If you use your generator in a very dusty area, like on a construction site or a dry farm field, you should check it even more often.
Clean the filter whenever it looks dirty. If you hold it up and can’t see through the pleats or if the foam is caked with grime, it’s time for a cleaning.
Replace the filter if it is physically damaged. Look for holes, tears, or cracks in the paper, or if the foam is falling apart. Even after a good cleaning, if a paper filter is still stained dark and you can’t see light through it, it’s time for a new one. Most paper filters should be replaced at least once a year with regular use.
Frequently Asked Questions
Can I run my generator without an air filter for a short time?
No, you should never run your generator without its air filter, even for a short period. Without this protection, dust and debris can directly enter the engine, causing rapid wear and potentially catastrophic damage to internal components like pistons and cylinders.
Can I use compressed air to clean my paper filter?
It is not recommended. High-pressure compressed air can force embedded dirt deeper into the paper pleats and may even tear the delicate material. The safe and effective method is to use low-pressure suction from a vacuum cleaner or gentle tapping.
Why does my foam filter need to be oiled?
The oil in a foam filter serves as an additional trapping mechanism. While the foam itself catches larger particles, the sticky oil captures fine dust that might otherwise pass through. This two-stage filtration provides much better protection for your engine in dusty conditions.
Conclusion
Cleaning your generator’s air filter is a quick, easy, and cheap task that has a huge payoff. It protects your investment, saves you money on fuel, and ensures your generator is ready to work when you need it most. By taking just a few minutes for this simple maintenance, you are giving your generator the clean air it needs to breathe easy and power on for years to come.